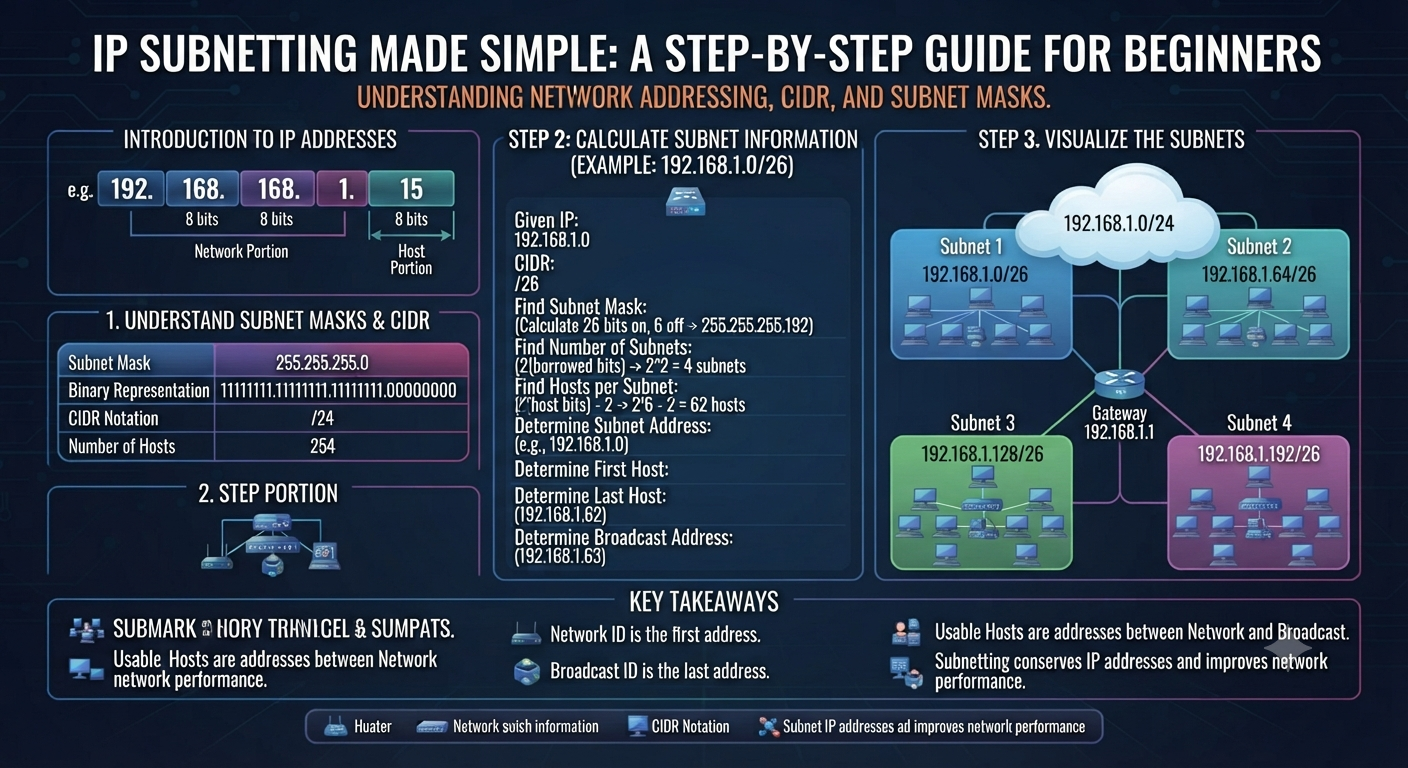
IP Subnetting Made Easy – A Novice’s Guide If you have ever opened a networking textbook, and run into a wall of binary math on the first page about subnetting, you are not alone. IP subnetting is the networking topic that scares the bejeebies out of beginners. But it’s really pretty simple once someone explains it in plain English rather than pure math. This guide will take you step by step, and with a real world example, so you can calculate subnets with confidence for your CCNA studies or your first office network. What is IP Subnet? IP subnetting is the technique of dividing a large network into smaller, more manageable sub-networks called subnets. Instead of having all devices on one flat network, subnetting lets you carve up that address space into logical chunks – one for each department, floor or purpose. Picture a company building with an open floor plan, and then the same building with private offices. Both are the same size in terms of people but breaking it down into rooms makes it much easier to manage where people go, control traffic and keep things organised. That’s precisely what subnetting does for a network. The significance of IP subnetting in networking Without subnetting, every device on a network is part of one big broadcast domain. As the number of devices on the network grows, this quickly becomes slow, messy, and insecure. Subnetting solves this by: Reduce network congestion by limiting broadcast traffic to smaller groups Improve security by isolating departments or types of devices from each other More efficient allocation of IP addresses and less waste of large address blocks Being able to localize problems to a particular subnet to aid troubleshooting This is one of the primary reasons why IP subnetting is one of the first practical skills tested in CCNA and other networking certifications – nearly all real-world network design decisions are based on it. Key terms you should know before There are some terms that come up over and over here, so it is helpful to define them clearly before we get into the steps: IP Address: A unique number assigned to each device connected to a computer network (e.g. 192.168.1.10) Subnet Mask: A number that divides the network part from the host part of an IP address (e.g. 255.255.255.0) CIDR Notation: A short form of a subnet mask, written as a slash followed by a number (e.g., /24) Network ID: Address that identifies the subnet, not a particular host Broadcast Address: This is the address used to send data to all devices on that subnet at once Host: Any device, such as a computer or printer, that has been assigned an IP address on the subnet How to Subnet IP Addresses (Step by Step) Here’s the real deal broken into five manageable steps. Step 1 — Know the IP Address Structure IPv4 address is 32 bits long, split into four groups known as octets (e.g. 192.168.1.10). Each octet can be from 0 to 255. An IP address is divided into two parts: the network part, which identifies the general network, and the host part, which identifies the particular device. Step 2 — Find the Subnet Mask The subnet mask tells you exactly where the network part ends and the host part begins. For example, a subnet mask of 255.255.255.0 (or /24 in CIDR notation) means that the first three octets are used for the network and the last octet is used for host addresses. This is the one number that the whole of every netting calculation is based on. Step 3 — Determine the Number of Subnets and Hosts Knowing the subnet mask, you can determine how many subnets and usable host addresses the subnet mask creates. The general formulas are Number of subnets = 2^ (borrowed bits) Usable hosts per subnet = 2^(remaining host bits) – 2 The “minus 2” is because of the network ID and the broadcast address which cannot be assigned to actual devices. This is where the bulk of the math anxiety actually happens. When you memorize the formula, it becomes rote. Step 4: Locate the Subnet Ranges Once you have worked out the number of subnets, you then need to work out the range of each subnet. This includes the network ID of the subnet, the usable IP range of the subnet, and the broadcast address of the subnet. It is this part of the process that makes the math practical to assign to devices in reality. Step 5. Assign IPs to Devices Then you assign individual IP addresses from the usable range of each subnet to devices, servers or interfaces, keeping the network ID and broadcast address free. This is where the entire subnetting process becomes a real working network design. Example Walkthrough of IP Subnetting Let’s walk through a simple real example. Imagine you have the network 192.168.1.0/24 and want to cut it into 4 smaller subnets. A /24 network has 8 host bits (32-24=8). To make 4 subnets you need to borrow 2 bits (2^2 = 4 subnets), so the mask changes from /24 to /26. Your new subnet mask is 255.255.255.192. This gives you 4 subnets with 64 addresses ( 2^6 = 64 ) each. Each subnet has 62 usable host addresses (2 are reserved for the network ID and broadcast address). The four resulting subnets are: 192.168.1.0/26 (usable range .1 to .62) 192.168.1.64/26 (Usable range .65 – .126) 192.168.1.128/26 (usable range: .129 to .191) 192.168.1.192/26 (usable range .193 through .254) That’s the whole process in action — one network address turned into four independent, organized subnets, each of which can hold 62 devices. Top Mistakes to Avoid in IP Subnetting When learning this skill, beginners tend to make the same handful of errors: forgetting to subtract 2 hosts for network ID and broadcast address Mixing up subnet mask and default gateway – they are two totally different things Miscoding borrowed bits, affecting all subsequent calculations IP conflicts across